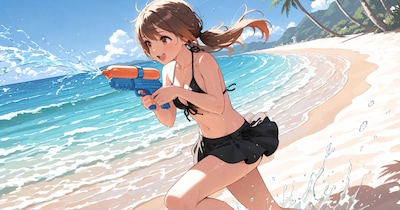
#海のメンバーシップの投稿

 28
28
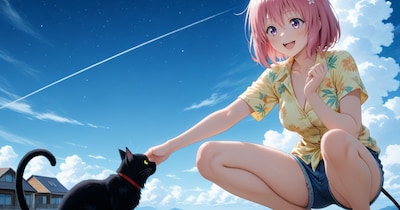
【スーパーリアル麻雀PⅣ】香織:水着でバカンス
100コイン/月以上支援すると見ることができます
るんぽす
 9
9
【プロンプト】長座
全体公開
✅【プロンプト:長座】 シンプルな姿勢ながらやってみると意外と難しい『長座』です。 長座とは、脚を伸ばして座る姿勢です。 いまのところ、このプロンプトを使えば出せる!という決め手は見つけられていません。 ですので、複数のプロンプトを使ってその姿勢を再現しています。 🎯『今回使用したプロンプト』 まずは長座のためのプロンプトですが、以下のようなものを使ってみました。 どれか1つではなく全て使っています。(※一部のイラストで入っていないプロンプトもあります。 legs extended straight out = 足をまっすぐ伸ばす straight legs = まっすぐな脚 on the floor = 床の上 flat on the ground = 地面に平らに seated stretch = 座ってストレッチ sitting with extended legs = 伸ばした脚で座る back straight = 背筋を伸ばす ※主に脚を伸ばすということと、床や地面に座っていることを指定しています。 今回は腕の指定はしていませんが、後ろに手をついて支えるようなポーズになることが多かったです。 座っている状態なのでsittingを使いたくなると思いますが、体感では入れない方が安定して出る感じがします。 (「座る」という指示から連想しやすい「椅子に座る」「あぐら」「体育座り」などの姿勢に引っ張られやすいため。) ですので、sitting with extended legsは無くても良いかもしれません。(掲載画像の半分くらいは抜いてあります。 🎯『ネガティブプロンプト』 脚を曲げてしまうような動作を入れてあります。 bent legs = 曲がった脚 crossed legs = 脚を組んだ状態 kneeling = 膝立ち crouching = かがんだ姿勢 sitting on chair = 椅子に座る姿勢 yoga pose,lotus pose,child's pose = 膝を曲げるヨガのポーズ knees,tucked legs = 膝や脚を畳んだ状態 spread legs = 脚を開く 脚を開いてしまうことが多かったのでspread legsを入れましたが、場合によっては多少開くのはアリかも。 それなりに安定して出るようになりましたが、モデルによっても変わると思いますので順番を入れ替えたり強度を上げたり試行は必要だと思います。 例えば参考イラストでは以下のものを強度指定しています。 プロンプト (straight legs:1.3) ネガティブプロンプト (knees:1.5),(tucked legs:1.5),(spread legs:1.2) ちなみに長座は検索するとlong sittingと出てきます。 これも試してみましたが、上手くいきませんでした。 🎯以前に投稿したイラストで脚を伸ばすのに使ったもの。 ※開脚していますが、上記プロンプトと少し違う物を使っていますので、ご参考までに。 体が硬い少女 ※R-15 https://www.chichi-pui.com/posts/1a63ef29-288e-4595-9cd5-93e4606f3a81/ 体が硬い少女2 ※R-18 https://www.chichi-pui.com/posts/6df62b05-2196-4888-8f8f-28c5b47be085/ # Model: shiitakeMix v2.0 by Vsukiyaki
Rio1616
 16
16
【プロンプト】yokozuwari(横座り)
全体公開
✅【プロンプト:yokozuwari(横座り)】 キャラクターの姿勢を表現するプロンプト『yokozuwari(横座り)』について解説してみます。 私がイラストを作成する際にわりとよく使っているプロンプトです。 特に気にすることなく使っていましたが、意外と上手く出ない方もおられるようです。 🎯『横座りは、イラストの解像度によって変わる。』 ①②:1152x2016(768x1344) ③④:1248x1824(832x1216) ⑤⑥:1344x1728(896x1152) ⑦⑧:1536x1536(1024x1024) ⑨⑩:1728x1344(1152x896) ⑪⑫:1824x1248(1216x832) ⑬⑭:2016x1152(1344x768) ※それぞれHires.fixで1.5倍にしてあります。 ※①~⑭はプロンプトなど同じ設定で解像度だけ変えてあります。 ※t2iのみで作成して、修正はしていません。 【プロンプト】 1girl,solo, full body,happy,big eyes,blue eyes,blonde hair,long hair,two side up,hair bobbles, looking at viewers,medium breasts,yokozuwari, red bikini,side-tie bikini bottom,visor cap,red cap, blurry background,sea, (watercolor \(medium\):0.3),(pastel color \(medium\):1.0), masterpiece,super fine illustration, 【ネガティブプロンプト】 bad quality,worst quality,low quality,lowres,bad anatomy,bad hands,missing fingers, extra digits,deformed,blurry,jpeg artifacts,watermark,signature,text,error,username, scan,artistic error,3d,chromatic aberration,muscular body,multiple faces,extra head, extra fingers,folded legs,bent knees,cross-legged,squatting,kneeling,crouching, Bend your legs,folded,bent over,nsfw,crotch,Back of the knee, 同じyokozuwariでもサイズによって姿勢が変わってきます。 縦長では横座りというよりwariza(割り座)やseiza(正座)に近くなります。 逆に横長ではlyingなどの寝そべった感じになってきます。 寝そべってしまう場合はarms supportなどを使って腕で支えたりするのも良いと思います。 個人的には正方形か1152x896あたりで使うことが多いですね。 縦長で使う場合は最初からwarizaを使うこともあります。 🎯『yokozuwariを使わないプロンプト』 ⑮⑯ 最後の2枚はyokozuwariを使わずに作ったものです。 横座りになるかどうかは微妙なところですが・・・。 プロンプト: legs straight,Place your calves on the ground,legs straight forward,knees fully straight,back straight,outstretched legs, 1girl,solo, full body,happy,big eyes,blue eyes,blonde hair,long hair,two side up,hair bobbles, looking at viewers,medium breasts, red bikini,side-tie bikini bottom,visor cap,red cap, blurry background,sea, (watercolor \(medium\):0.3),(pastel color \(medium\):1.0), masterpiece,super fine illustration, ネガティブプロンプト: 上と同じ 脚の状態を指定して作りましたが、こちらは姿勢が安定しません。 また、横座りより脚を伸ばしている感じになります。 モデルによっては出すのが苦手な場合もありますので、まったく出て来ないというのであればモデルを変えてみるのも1つの手だと思います。 # Model: shiitakeMix v2.0 by Vsukiyaki
Rio1616

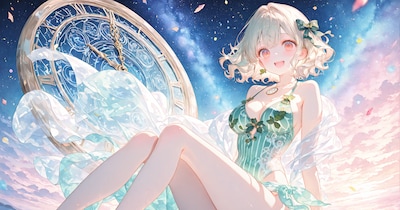
夏の窓辺|Summer Windowsill
全体公開
移ろいゆく風景画。 A landscape painting in transition. * N.あつめさんのXご活動1周年記念企画「あつめワールドと夏」への参加作品です。 あつめさんご活動1周年おめでとうございます☺︎ This work was created for N.Atsume-san's 1st anniversary project on X titled 'Atsume World and Summer.' Congratulations on your first anniversary, Atsume-san ☺︎ (Model) Midjourney V7 (Size) 1856 x 2624 pixels (Upscaler) unlimited waifu2x *2x / Model: swin_unet - photo / DeNoise: Low / Tile: 640, Shuffle / TTA: 0 / Alpha Channel: Disable (Last Seed) 454378141 (i2i Count) 0 time (Manual Adjustment) Sharpness Prompt: picture book style ephemeral sketch, beyond square window of vacant house seen from highly trafficked main street in town, dark indoors and dazzling outdoors, a small boat can be seen floating on bright blue sea, vibrant summer, chromatic aberration, kawaii chibi girl, short sleeve dresses, doodles drawn by a young child in highlighter pen, spiral, vertual reality, dreamland made of rock salt, décalcomanie, bold meta-composition with field of depth, layers upon layers, dynamic angles from diagonally below, glitch, limited palette, shining shades of brightness, whimsical, beautiful aesthetics --v 7.0 --raw --p xd97txk --sref 1970097021::1 3161817471::1 3604182537::3 568688171::4 3544290919::1 3710016932::1 2494083273::6 3717843000::2 1702533951::2 602153393::3 2220609054::3 2895306335::4 418458060::4 --sv 4 --ar 182:257 --q 4 --sw 300 --exp 50 --seed 454378141 --s 400
miya

Summer
全体公開
暑いと週末はいつも以上に疲れる・・・
炭酸水

Summer
全体公開
炭酸水

Summer
全体公開
お盆休み特集、やろうかなぁ・・・
炭酸水
 16
16
2025/08 upしてない生成作品
全体公開
ジンファンデル

girl
全体公開
炭酸水

もうすぐ夕日だね
全体公開
#海のビキニ 企画用に作成 AIだと光の感じが簡単に出せて、手描きに戻れなくなる… こんなシーンを経験してみたかった…
komon lab.

ちびざらし
600コイン/月以上支援すると見ることができます
のっ
 3
3
黒猫とToLoveるの某キャラ
全体公開
浜辺の黒猫と京子さん https://www.chichi-pui.com/posts/8cf3dffd-69ad-417b-8ae7-911fbacd050a/ の生成時に一緒に生成してあった某To Loveるキャラのイラストです。 もったいないので、こちらで公開(^-^)
えるがるむ
 3
3
飛び出すソーダ
600コイン/月以上支援すると見ることができます
のっ
 5
5
横座り
600コイン/月以上支援すると見ることができます
のっ
 5
5
没水着イラストです
全体公開
一枚目はるかさん、二枚目アカリさん、三枚目まどかさん、四枚目もまどかさん、五枚目は麗子さんです。
ことぴー

Girl
全体公開
次はメンバーシップ開設6ヶ月記念かなぁ・・・
炭酸水
 12
12
ミクさんと砂浜とサマードレス【多目版】
全体公開
るんぽす

メンバーシップ開設1ヶ月!
全体公開
メンバーシップ開設して1ヶ月を記念して R-15、R-18に特別投稿しました! ありがとうございます!
炭酸水

Girl
全体公開
もうずっと猛暑日・・・
炭酸水
 6
6
海神
全体公開
# キャプション - 割と遅くまで読み方知らなかった漢字🤤 - **えっちなのも予約してるよ** # 生成パラメータ ``` 1girl, skinny, standing, afloat, wide shot, (glasses:1.2), looking over eyewear, light smile, light frown, looking ahead, black hair, (long hair:1.1), hair rings, parted bangs, head wreath, green wreath, white halter dress, spaghetti strap, (see-through silhouette:0.9), holding wooden staff, (pink red staff:1.1), arm at side, floating red ribbon BREAK beautiful detailed skin, intricate detailed clothes, fine fabric emphasis, medium breasts, (perky breasts:0.9), (narrow waist:0.8), intricate detailed grey background, (transparent background:1.1), gradient background, outdoors, ocean, sky, cloud, fog, (landscape:0.8), light particles, bokeh, vignetting, (outside border:1.2) BREAK masterpiece, best quality, high quality, highres, extremely detailed, incredibly absurdres, very aethetic, 8k, official wallpaper, newest, perfect composition, perfect anatomy, good hands, detailed face, cute face, beautiful detailed eyes, shiny eyes, grey brown eyes, grey-framed eyewear, looking at viewer, backlighting, bloom, (depth of field:1.2), <lora:DetialN_XL:0.8> Negative prompt: worst quality, low quality, lowres, fewer, extra, missing, displeasing, oldest, old, recent, error, jpeg artifacts, text, watermark, signature, username, bad hands BREAK nsfw, mature, shaped pupils, sunglasses, muscular, long head, thick thighs, messy hair, (shiny skin:0.8), taut clothes Steps: 30, Sampler: Euler A Turbo, CFG scale: 4.5, Seed: 1276236100, Size: 896x1195, Model hash: 2d38bad9a8, Model: shiitakeMix_v20, Clip skip: 2, Lora hashes: "DetialN_XL: 5375479c0ab5", Version: f0.0.17v1.8.0rc-latest-277-g0af28699 ```
のっ
 25
25
ツインテール×バニー×海×巨乳 = 神は存在する
全体公開
ご主人様ぁ!海ですよ海!早く泳ぎましょうよぉ! そんな元気な声がプライベートビーチから聞こえてくる 一般庶民には入れないあの桃源郷にいるサカリ盛りのバニー 達の楽しそうに遊ぶ声が脳に焼き付いて離れない・・・ きっと夜のご奉仕も凄いんだろうななんて勝手に妄想している あ、やべ・・なんか黒い服着た人がこっちに走ってくる・・・
犬魔王
 6
6
夏だ!水着だ!
100コイン/月以上支援すると見ることができます
Nekonekoあっくん
LIMEで海の日
全体公開
JUNGLEと比較用にLIMEでも生成 全体的に描きこみが細かいのと大人っぽくなりました
ア ル
【加筆】メスガキ水着プルツー
全体公開
見えている左足が右足だったので修正。タイストラップの♡の中を修正。脛の角度を足首と繋がるように修正。 海の日2025記念と言うことで全体公開しときます。 元絵とプロンプトはこちら↓ https://www.chichi-pui.com/posts/3602c7a1-900c-489d-9f6a-f7cccd176eca/
便器マン
 11
11
【スーパーリアル麻雀PⅤ】遠野みづき・バカンス編②
100コイン/月以上支援すると見ることができます
るんぽす
 30
30
【30枚】幻想的な海
500コイン/月以上支援すると見ることができます
はや太郎
 15
15
夏といえば水着ミクさん【多目版】
全体公開
暑くなってきました
るんぽす
 5
5
例の水着
全体公開
# キャプション - 実は新しいモデルを仕入れるたびにチャレンジしてる水着👉️ - IL系やっぱしゅごい…!(; 'ω') # 生成パラメータ ``` 1girl, skinny, standing, thigh shot, (twisted torso:0.7), (glasses:1.2), (looking over eyewear:1.2), smile, head tilt, (:D:1.2), looking back, black hair, high ponytail, long hair, navy blue bikini, plant patterned bikini, (frills trim, intricate frills:1.1), chinese knot, (red strap:1.1), arms behind head, legs apart, (spread arms:0.8) BREAK beautiful detailed skin, shiny skin, (tan:0.8), intricate detailed clothes, lowleg, (white frills:1.3), (hair rope:1.1), gold print, medium breasts, (perky breasts:0.9), cleavage, (butt crack:0.8), arched back, intricate detailed white background, (outside border:1.4), outdoors, (ocean, beach, sun, blue sky, cloud:0.8), pastel color \(medium\), (bokeh:1.2), (light particles:1.1), wind BREAK masterpiece, best quality, high quality, highres, ultra detailed, incredibly absurdres, 8k, official wallpaper, newest, perfect composition, perfect anatomy, good hands, (backlighting:1.1), soft lighting, detailed face, cute face, detailed eyes, shiny eyes, shiny hair, grey eyes, red-framed eyewear Negative prompt: worst quality, low quality, lowres, (bad), fewer, extra, missing, unfinished, displeasing, text, error, jpeg artifacts, watermark, signature, username, oldest, old, recent, bad hands, extra digits BREAK (pale skin:1.2), dark skin, tanlines, tsurime, shaped pupils, sunglasses, long head, breasts apart, multicolored hair, loli, teeth, scrunchie, skindentation Steps: 30, Sampler: Euler A Turbo, CFG scale: 5.5, Seed: 254506454, Size: 896x1195, Model hash: d8f4fc4d09, Model: novaAnimeXL_ilV30HappyNewYear, Clip skip: 2, Version: f0.0.17v1.8.0rc-latest-277-g0af28699 ```
のっ
 5
5
水彩チャレンジ
全体公開
# キャプション - https://membership.chichi-pui.com/posts/images/4fb6932c-253d-4691-9dac-5428b1096bb0/ - ↑コレが可愛かったからそれっぽいロケーションに変えてみたやつ - IL系で水彩風やるのむっずい…!😭 # 生成パラメータ ``` 1girl, skinny, walking, (full body:0.8), (twisted torso:0.5), (glasses:1.2), (looking over eyewear:1.2), (///:1.1), light smile, head tilt, platinum blonde hair, straight hair, medium hair, hair between eyes, (white oversized shirt:1.1), blue sailor collar, short sleeves, dixie cup hat, hat ribbon, (arms up, hands up:1.1), legs apart, (spread arms:0.7) BREAK (deformed:1.2), chibi, beautiful detailed skin, shiny skin, tan, intricate detailed clothes, medium breasts, (perky breasts:0.9), simple blue background, (outside border:1.4), ocean, beach, sun, blue sky, cloud, child's drawing, (pastel color \(medium\):1.2), (watercolor \(medium\):1.4), (sketch:1.3), (subtle watercolor effect:1.4), (bokeh:1.3), (light particles:1.1), wind BREAK masterpiece, best quality, high quality, highres, ultra detailed, incredibly absurdres, 8k, official wallpaper, newest, perfect composition, perfect anatomy, good hands, (backlighting:1.2), soft lighting, detailed face, cute face, detailed eyes, shiny eyes, shiny hair, hair flowing over, grey green eyes, round eyes, black-framed eyewear Negative prompt: worst quality, low quality, lowres, (bad), fewer, extra, missing, unfinished, displeasing, text, error, jpeg artifacts, watermark, signature, username, oldest, old, recent, bad hands, extra digits BREAK (pale skin:1.2), dark skin, tanlines, tsurime, shaped pupils, sunglasses, hanging breasts, long head, breasts apart, multicolored hair, breast pocket, wet, panties, loli, child Steps: 30, Sampler: Euler A Turbo, CFG scale: 5.5, Seed: 908836326, Size: 896x1195, Model hash: d8f4fc4d09, Model: novaAnimeXL_ilV30HappyNewYear, Clip skip: 2, Emphasis: No norm, Version: f0.0.17v1.8.0rc-latest-277-g0af28699 ```
のっ

Dreaming Summer Girl
全体公開
夏空の下、夢中で遊ぶ時間。 きらめく波と、はじける笑顔をあなたに——✨ Under the summer sky, she plays with pure joy. Let the sparkling waves and her dazzling smile reach your heart.🌈
uyciak

鋼翼の守護者 ― 白砂に立つ
100コイン/月以上支援すると見ることができます
冴月朋也
 27
27
【咲-Saki-】のどっちのフリル水着【多目版】
100コイン/月以上支援すると見ることができます
るんぽす

飛んでるみたい!
全体公開
高い所から海を見下ろすと、空を飛んでるみたいに感じられるわ♡ 危ないから気を付けて!
22(にゃんにゃん)
 3
3
【プラン紹介】こつこつと準備中。。。
全体公開
メンバーシップが始まってから1ヶ月ぐらい…。 最初の投稿以外まだなにもしておりませんが、ぼちぼちと水面下で用意はしていっております(笑) 今後、購読をご検討いただいております方(…いるのか?)に向けてプランのご紹介をさせていただければと存じます! 1. フリー(全員公開) ●料金: なし ●特徴: 無料で公開されており、通常投稿をご覧になって、私のイラストをもっとみてみたい方におすすめです。 ●内容 ・メンバーシップ限定イラスト集:ちょいみせ版: 4ページ 2. さざなみコース(おためしプラン) https://membership.chichi-pui.com/plans/af2ceb5d-1c52-4564-bf8c-4d58c67bb41e/ ●料金: 100コイン ●特徴: 通常投稿・フリーコースより少し多くのイラストを楽しめるプランです。私の生成するイラストがどんなものかを試してみるのに最適です。 ●内容 ・メンバーシップ限定イラスト集:おためし版 12ページ ・未公開投稿画像:通常の投稿で未公開、没となったイラストをご紹介 3. ウェーブコース(ライトプラン) https://membership.chichi-pui.com/plans/3a751dcf-cf62-4590-a4c5-7e0945bbc003/ ●料金:300コイン ●特徴: さざなみコース(おためしプラン)の内容に加え、より多くの作品を楽しめます。 ●内容 ・メンバーシップ限定イラスト集:ライト版 20ページ ・未公開投稿画像:ちちぷいさんへの通常の投稿で未公開、没となったイラストをご紹介。さざなみコースよりも多くの未公開を紹介予定。 ・新作イラストの先行公開:ちちぷいさんに今後投稿する予定の作品を先行で配信します。 4. オーシャンコース(フルプラン) https://membership.chichi-pui.com/plans/8798413a-c121-46fc-918e-277181cb84db/ ●料金:500コイン ●特徴: さざなみコース(ライトプラン)の内容に加え、より多くの作品を楽しめます。 ●内容 ・メンバーシップ限定イラスト集:完全版 40ページ ・未公開投稿画像:ちちぷいさんへの通常投稿で未公開、没となったイラストをご紹介・さざなみコース、ウェーブコースよりも多くの未公開を紹介予定。 ・新作イラストの先行公開:ちちぷいさんに今後投稿する予定の作品を先行で配信します。今後の新作投稿を先行で配信します。ウェーブコースよりも多くの新作を紹介予定。 ・リクエスト制作(β):ご登録いただいておりますユーザー様のリクエストを可能な限りお聞きします。 ※内容によってはお受けできない場合やお時間をいただく場合がございます。 ●メンバーシップ限定イラスト集 メンバーシップにご加入いただいておりますユーザー様向けに配信させていただければと思っています。 ちちぷいさんの通常投稿に比べてより高画質(大画面サイズ)、および色調補正、加工を施したイラスト集になります。 それぞれプランによって見れるページ数を増減させますので、最初はさざなみコース(おためしプラン)でみていただいてお気に召されましたらウェーブコース(ライトプラン)、オーシャンコース(フルプラン)で見ていただけると大変嬉しいです。 当分は年齢制限ありのものがメインになってくると思います。追々全年齢のものもやっていけたらと思います。どのプランでもどちらも楽しめるようにはするつもりです!
aquarium
 8
8
橘ありすグラビア撮影中【裏】
全体公開
【裏】=後方ローアングルな構図です😅
るんぽす

夕陽に舞う幻想の調べ
100コイン/月以上支援すると見ることができます
冴月朋也

断崖絶壁の海岸線を散策するケモミミお姉様
100コイン/月以上支援すると見ることができます
冴月朋也
 3
3
空中アクアリウム
500コイン/月以上支援すると見ることができます
sugasaは背景が欲しい
 10
10
メイキング「夏飛行」|Making "Summer Flight"
全体公開
ちちぷいの水着コンテスト審査員賞受賞作品「夏飛行」を引用しつつ、普段のイラスト制作工程をご紹介させていただきます。 2024年7月に作った結構前のイラストなので、今ならこう作る、という手順も一緒に書いていきます。 このページに掲載されているプロンプトなどの情報は1枚目のイラストのものです。 「夏飛行」の詳細は下記作品ページにてご覧ください。 「夏飛行」 https://www.chichi-pui.com/posts/3c9d3a63-aecc-438e-b620-ce002fb23483/ 工程1) テーマ・コンセプト決め 作品のテーマとその切り口を考えます。 普段のイラストは日頃ふと感じたことから作ったものと、手を動かしながら作ったものとで半々です。 たとえば「町を歌う」「みんなの家」は前者で、「この空は青い家」「人の巣」は後者です。 これらはすべて、比喩・暗喩表現を骨子とした作品です。 「町を歌う」※クジラの背中に乗った町のような世界、の比喩 https://www.chichi-pui.com/posts/f5d84b28-2a4e-4115-a3d1-e14d9a86482b/ 「みんなの家」※家の中で暮らすように町の中で暮らす野良猫、の比喩 https://www.chichi-pui.com/posts/cfa04db9-317a-4a22-a847-b6da1dd94771/ 「この空は青い家」※ブラーノ島の町の家のように青い空、の比喩 https://www.chichi-pui.com/posts/37010b85-92ae-4342-a526-41a986a8d6f8/ 「人の巣」※雛鳥のような町、の比喩 https://www.chichi-pui.com/posts/6092af9c-68cb-415d-99c3-a1483f975859/ 「夏飛行」は前者で、プールに飛び込むの楽しかったな+あの夏見た飛行機雲よかったな、からできたイラストです。 「夏空に雲を引く飛行機のように、青空色したプールに飛び込む女の子」というキャプションそのままの絵を作ろうとしました。 体験に基づくイラストは引き出しに限りがありますが、表現したいことが明確なぶんAIに踊らされにくくなります。 工程2) 生成 *2,3枚目 プロンプトを足したり引いたりしながら、にじジャーニーで構図と絵柄を作ります。 夏飛行では、優先度順に以下の3つがOKテイクの条件でした。 1. 飛行機が雲を引いている 2. ダイナミックにジャンプしている 3. 水着の上に短パンを履いている この工程では後から修正する前提で、細かい部分は無視して骨組みを作りました。 水着の上に短パン、は着替える時間すら惜しんで夏に飛び込むわくわく感と、背徳感を演出しました。 ちなみに、ここで狙った絵になってくれた場合、あとは必要に応じて微修正して完成です。 工程3) 全体の絵柄調整 *4枚目 全体をi2iして絵柄を調整します。 前工程の3つの条件部分が、さらに際立ってくれると嬉しいです。 あと名札が消えて、市民プールっぽくなって、きちんと水の上を飛んでくれたら理想的です。 ここでは、にじジャーニーのVariations機能のSubtleを使いました。弱めの変換です。 その結果、一眼レフカメラの写真を意識した2:3の解像度が生かされた、ダイナミックな構図になってくれました。 また、飛行機が短パンに移って飛行機雲が矢印に変わったことで、飛行機みたいに飛び込む比喩が強調され、焦点が女の子に合いました。 工程4-1) 部分修正: プール *5枚目 大枠の固まった絵に部分修正を加えます。 全体のi2iでは水の上を飛んでくれなかったので、下部分の広範囲を思い切って修正します。 水面ぎりぎりからのアングルで、女の子との対比で静かな水面になってほしいです。 ここでは、にじジャーニーのVariations機能のRegion、矩形範囲選択で修正しました。 狙ったアングルと水面になり、濃い色のプールのタイルのおかげでイラストにコントラストが生まれました。 膝の水しぶきが目立つようになりましたが、泳ぐのを待ちきれない早る気持ちや、夏の予感のように感じられたので残しました。 工程4-2) 部分修正: 足と文字 *6枚目 太ももとふくらはぎの太さが気になります。 水泳部っぽい筋肉のつき方ですが、ここではごく平凡な女の子に飛び込んで欲しいので微修正を加えます。 テーマ的にも解剖学的にも、感情移入できるくらいのリアリティがほしいです。 修正は上記に加えて足の指の修正と、水面の文字の削除を同時に行いました。 いずれも自由範囲選択で、必要最低限の箇所だけを変換しています。 「夏飛行」制作時は修正した絵にさらに修正を加えるシリアルな直し方でしたが、今なら画質向上のためパラレルで直します。 具体的には、工程4-1)で出力したイラストに対して工程4-2)〜4-4)の部分修正を別々に行ったのち、編集段階で各修正内容をくっつけます。 i2i回数を揃えてマージすると、i2iによって低下した画質の影響による違和感がなくなります。 このイラストでは合計5回i2iをくぐらせていますが、この方法だとその画質低下を3回分に減らせます。 手作業の編集を加える前提で工程3)の出力をベースに修正すれば、画質低下は2回分になります。 工程4-3) 部分修正: 表情 *7枚目 もっと、飛び込むぞー飛び込むぞー、みたいな期待に満ちた目になってほしいです。 プロンプト「sanpaku eyes」の生かされた眉毛とまつ毛になるよう修正します。 ここでも自由範囲選択で部分修正を行いました。 この絵にかぎらず、目元だけ直したら思ったニュアンスが出てくれた、ということも多いです。 工程4-4) 部分修正: 手と耳 *8枚目 手指と耳がすこし汚いのを直したいです。 プロンプト「open hands」を追加して、自由範囲選択で両手と両耳を同時に修正しました。 以上で、にじジャーニーでの作業は完了です。 工程5) 編集 *9枚目 GIMPでイラストに編集を加えます。 https://www.gimp.org/ ここでは、i2iによる画質低下によって変化した明るさとコントラストを、元の状態に近づけました。 後のアップスケールで明るさと色味が増すことを加味して、工程3) と同程度に調整しています。 この工程での編集作業は、当時と今とでは少し違っています。 元のニュアンスに近づけるところは同じですが、白飛び・黒つぶれを避けるためコントラストはなるべくそのままにしています。 また、i2i部分に発生したジャギーなどを手描きで修正するほか、必要に応じてシャープやホワイトバランスを調整しています。 ホワイトバランスの自動補正機能を使う場合もあれば、RGBチャンネルの各レベルを手動調節する場合もあります。 自動補正機能は調節が効かないのですが、補正後の絵を元の絵に重畳して、透明度を上下させることで微調整しています。 工程6) アップスケール *10枚目 waifu2xでイラストをアップスケールします。利便性が良いため、クラウド版を主に利用しています。 https://www.waifu2x.net/ スタイル・拡大・画像形式の設定は常に「写真」「2x」「PNG」で使っています。 スタイルを「写真」にしているのは、他の設定に比べて仕上がりがナチュラルに感じられたためです。 素材感を残した繊細なタッチを要求することが多いので、この設定固定になりました。 アップスケールは必ず、ノイズ除去「なし」と「中」のふた通りの出力を、実寸表示で比較します。 ノイズ除去が十分か、ピンボケしすぎていないか、質感が失われていないかなど全体をチェックして適切な設定を選びます。 「夏飛行」は画質の低下が影響してか、設定「中」だと汚れが目立ったので「高」に変更しました。 フラットな絵柄のイラストにしたかったのも、設定を変更した理由のひとつです。 にじジャーニーのアップスケーラーは、求めるニュアンスと違う場合がほとんどなのでごく稀にしか使いません。 この工程も以前とは少し作業内容が変わっています。 まず、ノイズ除去「高」と「最高」はほぼ使わなくなりました。 ノイズ除去の強度を上げるよりも、アップスケール前編集でシャープをかけた方が鮮明な絵になるためです。 ただ、シャープにしすぎると過剰にノイズ除去されて逆にピンボケすることがあるので、その都度注意しています。 ノイズ除去しない・できない場合は、絵のニュアンスが崩れない範囲で、除去するときよりも強めにシャープをかけます。 4倍サイズへの拡大はunlimited:waifu2xを使います。こちらはブラウザ版です。 https://unlimited.waifu2x.net/ クラウド版と比べてきめ細やかになる印象で、個人的にはこちらの方が好みです。 ただ、そのぶん容量が増えたり、拡大に時間がかかったりするため両者は使い分けています。 固定設定は「Model: swin_unet / photo」「Tile: 640」「TTA: 0」「Alpha Channel: Disable」です。 waifu2x公式のドキュメントによると「swin_unet / photo」モデルは学習にGANを使用しているそうです。 学習にGANを使っているモデルでは、TTAの設定は無視されるとのことですので、TTAの値は任意で良いと思われます。 あとは、Upscalingを「4x」に、DeNoiseを任意の値に設定して拡大を実行すれば作業完了です。 なお、2倍拡大済みのイラストをさらに2倍拡大すると画質が低下するので、4倍拡大する際は必ず未拡大のファイルを使用します。 以上の工程を経て「夏飛行」は完成しました。このような感じで、日頃イラストを制作しています。 ご質問などございましたら、お気軽にコメントください。•'-'•)و 最後までごお付き合いくださり、どうもありがとうございました! イラスト: 夏紀行 * I'd like to introduce my regular illustration process while referencing "Summer Flight," which won an award at the Chichi-pui swimsuit contest. Since this illustration was created in July 2024, I'll also include how I would approach it differently today. The prompts and other information on this page are for the first illustration. For more information on "Summer Flight," please see the following work page. "Summer Flight" https://www.chichi-pui.com/posts/3c9d3a63-aecc-438e-b620-ce002fb23483/ Process 1) Theme & Concept Decided I start by considering the theme and approach for the artwork. My usual illustrations are split equally between those inspired by sudden everyday realizations and those that develop while working with my hands. For example, "Sing About Town" and "Everyone's Home" are the former, while "This Sky Is a Blue House" and "Human Nest" are the latter. These are all works that have metaphor and allusion as their framework. "Sing About Town" *A metaphor of a world like a town riding on a whale's back https://www.chichi-pui.com/posts/f5d84b28-2a4e-4115-a3d1-e14d9a86482b/ "Everyone's Home" *A metaphor of stray cats living in town as if in a house https://www.chichi-pui.com/posts/cfa04db9-317a-4a22-a847-b6da1dd94771/ "This Sky Is a Blue House" *A metaphor for a sky as blue as the houses in the town of Burano https://www.chichi-pui.com/posts/37010b85-92ae-4342-a526-41a986a8d6f8/ "Human Nest" *A metaphor of a town like baby birds https://www.chichi-pui.com/posts/6092af9c-68cb-415d-99c3-a1483f975859/ "Summer Flight" is an illustration of the former, which was created by thinking about how fun it was to jump into the pool and how nice it was to see the airplane clouds that summer. I aimed to create an illustration that directly represented the caption: "A girl diving into a sky-blue pool like an airplane drawing clouds in the summer sky." Illustrations based on experience are limited in number, but the clarity of what I want to express is less likely to be drowned out by AI. Process 2) Generation I use niji journey, adding and removing prompts to create the composition and style. For "Summer Flight," these were the three OK-take conditions in order of priority: 1. An airplane drawing clouds 2. A dynamic jumping pose 3. Wearing shorts over a swimsuit At this stage, I focused on creating the basic structure, knowing I could modify details later. The shorts over the bathing suit created a sense of excitement and immorality of jumping into summer without even taking the time to change. Incidentally, if the desired image is achieved at this point, I only make necessary minor adjustments and complete. Process 3) Overall Style Adjustment Convert the entire image and adjust the illustration pattern. Ideally, I want the three conditions from the previous step to stand out more. Also, it would be ideal if the name tag disappeared, made it look like a civic pool, and if it flew over the water properly. I used niji journey's Variations feature with Subtle setting for mild transformation. This resulted in a dynamic composition that utilized the 2:3 resolution reminiscent of DSLR photography. The airplane moving to the shorts and the contrail becoming an arrow emphasized the metaphor of diving like an airplane, bringing the girl into focus. Process 4-1) Partial Modification: Pool Partial modifications are made to the illustration once the framework is solidified. Since the overall i2i didn't achieve the effect of flying over water, I decided to modify a large area of the lower section. I wanted a quiet water surface from a low angle to contrast with the girl. Here, I used Region in the Variations function of niji journey and modified it with a rectangular range selection. This achieved the desired angle and water surface, while the dark pool tiles created contrast in the illustration. The splashes on her knees became more noticeable, but I left them as they were because I felt like she couldn't wait to swim and the anticipation of summer. Process 4-2) Partial Modification: Legs and Text The thigh and calf sizes needed adjustment. She has the muscle tone of a swimmer, but here I want a very ordinary girl to jump into the pool, so I will make slight modifications. Both thematically and anatomically, I wanted enough realism for viewers to empathize with. Along with these changes, I modified the toes and removed text from the water surface. All modifications were made using free-form selection, changing only the necessary areas. While "Summer Flight" was modified serially, now I would make modifications in parallel for better image quality. Specifically, I would apply modifications 4-2 through 4-4 separately to the image from step 4-1, then combine the modifications during editing. By merging illustrations with the same number of i2i executions, it is possible to eliminate the discomfort caused by the effect of image quality degraded by i2i. This illustration underwent 5 i2i iterations, but this method would reduce quality loss to 3 iterations. Using Process 3 output as a base for modifications with manual editing would reduce quality loss to 2 iterations. Process 4-3) Partial Modification: Expression I wanted eyes that expressed more anticipation, like "I'm gonna dive! I'm gonna dive!" I modified the eyebrows and eyelashes to incorporate the "sanpaku eyes" prompt. I used free-form selection for partial modification here as well. Often, just adjusting the eye area achieves the desired nuance, not just in this illustration. Process 4-4) Partial Modification: Hands and Ears I wanted to clean up the slightly messy hands and ears. The prompt “open hands” was added, and the free range selection feature was used to modify both hands and both ears. This completed the niji journey phase of the process. Process 5) Editing I use GIMP to edit the illustration. https://www.gimp.org/ Here, I adjusted the brightness and contrast that had changed due to i2i quality loss, bringing them closer to their original state. The brightness and color are adjusted to the same level as in process 3), taking into account the increase in brightness and color in the later upscaling. Editing in this process is a little different now than it was then. While I still aim to maintain the original nuance, I now try to preserve contrast to avoid white burnout and black crushing. I also manually correct jagged edges from i2i areas and adjust sharpness and white balance as needed. Sometimes I use automatic white balance correction, other times I manually adjust RGB channel levels. While the auto-correction feature isn't adjustable, I can fine-tune by overlaying the corrected image onto the original and adjusting opacity. Process 6) Upscaling I use waifu2x for upscaling, primarily the cloud version for convenience. https://www.waifu2x.net/ I consistently use "Photo" style, "2x" enlargement, and "PNG" format. The style is set to "Photo" because the finished product looks more natural than other settings. This became my fixed setting as it preserves the delicate touches and material textures I often require. I always compare two outputs with noise reduction "None" and "Medium" at actual size. I check whether noise reduction is sufficient, if there's too much blur, if textures are preserved, etc., to choose the appropriate setting. Perhaps because of the reduced image quality, “Summer Flight” was changed to “High” because the dirt was noticeable at the setting “Medium”. Wanting a flat illustration style was another reason for this change. I use the niji journey upscaler only on rare occasions, because most of the time it is not the nuance I am looking for. This process is also slightly different from the previous. I rarely use "High" or "Highest" noise reduction now. Adding sharpening during pre-upscale editing produces clearer images than increasing noise reduction. However, too much sharpening can lead to excessive noise reduction and blurring, so I monitor this carefully. When noise reduction isn't used or impossible, I apply stronger sharpening within limits that preserve the illustration's nuance. Use unlimited:waifu2x to enlarge to 4x size. This is the browser version. https://unlimited.waifu2x.net/ I personally prefer this over the cloud version as it produces finer details. However, I use both depending on the situation due to larger file sizes and longer processing times. My fixed settings are "Model: swin_unet / photo," "Tile: 640," "TTA: 0," "Alpha Channel: Disable." According to waifu2x documentation, the "swin_unet / photo" model uses GAN for training. For GAN-trained models, TTA settings are ignored, so this value can be arbitrary. Then, set Upscaling to "4x," DeNoise to preferred value, and execute the enlargement to complete the process. To avoid image quality degradation, I always use the original file before enlargement for 4x upscaling, rather than further upscaling a 2x enlarged image. The "Summer Flight" was completed through the above process. This is how I produce illustrations on a daily basis. If you have any questions, please feel free to comment.•'-'•)و Thank you very much for following along until the end! Illustration: Summer Journey * (Model) niji journey V6 (Upscaler) waifu2x *2x / Photo / NR: Medium (Last Seed) 3882162849 / 3947025995 (i2i Count) 3 times / Whole conversion by strong/subtle remix and partial modification. *Total count is 4 times. (Manual Adjustment) Merge fixes, Handwritten, Sharpness Prompt: 1girl, small girl, everything is blue colors, transparency, extremely detailed line art, kawaii, vapor trail, cute illustration, airplane patterned shirt, short pants, oversized straw hat, sun flower, wet white long hair, flat chest, pop designed coordination, eat ice cream, floating in midair, Inside a plastic bottle, in the sea, from below, harmonious colors, blue background, sun, blue sunlight, cumulonimbus, sanpaku eyes, close to viewer, looking up, vibrant colors, beautiful aesthetic, absurdres, highres, very precise detailed cg, official art, 16k, 8k, hyper detailed, highest image quality, ultra-detailed face, ultra-fine brushstrokes:: --s 400 --niji 6 --sref 2412348872 2895306335 --sw 80 --ar 2:3
miya

結菜(ゆな)と海デート
600コイン/月以上支援すると見ることができます
ヒナさん
 27
27
ビキニ3人組
全体公開
メンバーシップ公開いたしました!メンバーさま限定作品も随時更新予定ですのでお楽しみに! はや太郎のメンバーシップ はこちら↓ https://membership.chichi-pui.com/users/hayaai18/membership/
はや太郎